Hitting the ball is an essential skill in volleyball. Despite if the hit is for serving, spiking, or volleying, it is vital for beginners to learn how to hit a volleyball.
There are various methods for teaching hitting. You could use a three or four-step approach, focus on your body position and contact, or even find errors that may be causing your hit to go haywire. In this article, numerous aspects of the hit are broken down so you can zero in on maturing to a solid hitter.
You will find when these basic skills in volleyball hitting are mastered your level of playing will dramatically improve along with your confidence and approach to playing the game.
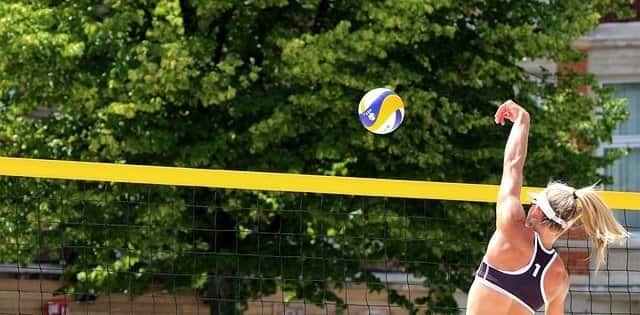
1. Three-step approach
The three-step approach is a comprehensive method for younger players or those who are new at volleyball. As the name suggests, the approach uses three steps to approach the ball, setting you up for hitting the ball in the air. While a four-step approach can also be useful, a three-step approach is more appropriate for newer players who do not set very high. A four-step approach may be too long of an approach. Further, a three-step approach can be used throughout a volleyball career and will often be used by middle-hitters.
Calling it a three-step approach can be somewhat confusing for new players because, as you’ll see with the step-by-step breakdown below, you’re actually taking two big steps forward and then using the third step to plant your foot beside the other to take off with both feet.
Three-step approach for right-handed players
- Set up
Start with your right leg forward with your weight also positioned forward, leaning over your right leg. Your arms should be in front of you, bent at the elbows at a 90 degree angle, with palms facing the floor. - Step one
Take a big step with your left foot, swinging your arms backwards. Imagine your fingertips pointed toward the ground with straight arms as you take that step. - Steps two and three
The next two steps are fast and happen in quick succession.
Take another big step with the right foot while also swinging both arms backwards to give you a base of momentum in your jump. For more power, it’s also helpful to keep your upper body leaning forward.
The third step is a smaller step with your left foot, bringing it forward to plant it beside your right foot with the toes pointed in, almost in a pigeon-toed step. This formation allows you to utilize your energy to use both legs to explode up into the air.
During the third step you also swing your arms forward to position your hands to hit as you jump in the air. BOTH your arms should come up over your head: your left arm is straight in the air, with fingertips spotting the ball and the right arm is bent behind the head, fingertip forward, getting ready to hit the ball. Ideally, your hand will be about six inches behind the ball, allowing you to make contact at your highest point in your jump.
- Landing
Finally, land on the balls of your feet. Ensure your knees are bent to protect your body during the landing. And allow your right arm to follow through the full arm swing after hitting the ball, again to maximize hitting power.
Three-step approach for left-handed players
- Set up
Start with your left leg forward with your weight also positioned forward, leaning over your left leg. Your arms should be in front of you, bent at the elbows at a 90 degree angle, with palms facing the floor. - Step one
Take a big step with your right foot, swinging your arms backwards. Imagine your fingertips pointed toward the ground with straight arms as you take that step. - Steps two and three
The next two steps are fast and happen in quick succession.
Take another big step with the left foot while also swinging both arms backwards to give you a base of momentum in your jump. For more power, it’s also helpful to keep your upper body leaning forward.
The third step is a smaller step with your right foot, bringing it forward to plant it beside your left foot with the toes pointed in, almost in a pigeon-toed step. This formation allows you to utilize your energy to use both legs to explode up into the air.
During the third step, you also swing your arms forward to position your hands to hit as you jump in the air. BOTH your arms should come up over your head: your right arm is straight in the air, with fingertips spotting the ball and the left arm is bent behind the head, fingertip forward, getting ready to hit the ball. Ideally, your hand will be about six inches behind the ball, allowing you to make contact at the highest point in your jump.
- Landing
Finally, land on the balls of your feet. Ensure your knees are bent to protect your body during the landing. And allow your left arm to follow through the full-arm swing after hitting the ball, again to maximize hitting power.

2. Four-step approach
The main difference between the three-step and the four-step is the additional step. This small starting step allows for a faster approach, so you may graduate to a four-step after perfecting the three-step. Make sure to swing your arms to allow for a deeper and higher jump. Right before you jump, bend your knees and get low. This produces a higher jump. Keep your arms up above your head so as not to lose momentum.
On your hit, make sure your body is facing the court. Open your arm by twisting your shoulders, as opposed to squaring up with the court. This gives your swing more power. Hit through the ball; do not stop on contact. Finally, just like the three-step, jump and land with both feet.
For a four-step, as mentioned, you simply add the smaller first step. Your pattern will then look:
Right-handed: right step, left step, quick right, quick left where you pigeon toe your foot.
Left-handed: left step, right step, quick left, quick right where you pigeon toe your foot.
The third step plants you where you want to take off, and your final step is used to help your momentum change directions to up. This approach is fitting for attackers.
3. Slide Approach
Unlike the three or four-step approaches, in the slide approach, you do not jump off with both feet. Instead, you jump off a single leg, much like a layup in basketball. This particular approach gives the impression of drifting in the air.
In this method, you typically use four steps; however, if your legs are longer, you may be fine with three. Where in the three or four-step approach, your arm movements can seem a bit unnatural, in the slide approach, your arms pump just like they would if you were running.
Ideally, you should move from slow to fast. After approaching the net, slide to the side, jumping up as the ball is set. Drive your right knee high, draw your elbow back before the left foot leaves the ground, and square your shoulders to the ball.
The elbow should rotate up, allowing the hand to have a high contact point. Additionally, the hand is now vertical and has a full extension on the hit.
4. Body positioning for hitting
If your body position relative to the ball is off, your hit is guaranteed to be slower and less powerful than desired. Misjudging the set is one of the biggest mistakes you can commit; it leaves the ball behind you.
By maintaining a good swing, you can effectively tell if there is a blocker in front of you, as well as have power due to body position. When you leave the ground for your jump, the ball ought to be in front of you. Swing through your hit, ensuring you are on top of the ball. If you aren’t, you risk the chance of sending the ball out of court or even into the stands.
Swinging your arm to hit is a move your entire body makes. Use your core with your arm and shoulder to power through your hit. Your body will thank you as an injury is less likely when you use your entire body and not just your arms. Do this by pulling in your abs as if you were piking. Feel the power drive through your arm and shoulder. Execute the motion quickly for an additional boost, using an open hand and wide fingers while hitting downward.
5. Hitting the volleyball
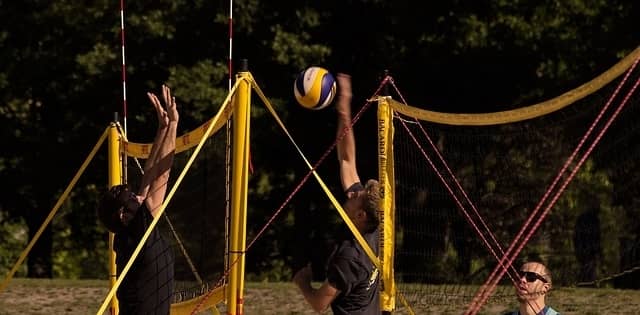
This part seems so simple, and yet the entire approach and body positioning can all go to waste if you mis-hit. A trip up here generally gives an easy dig to your opponents.
Watch the ball while taking note of the block in your peripheral vision. When the ball is in front of you, contact the top, center of the ball. Follow through with contact. Your goal is to hit the ball just as you are coming down from jumping. If you are too far into coming down, you are jumping too early. On the opposite side, if you are eye to eye with the ball, you are jumping too late.
Don’t worry about getting it right the first time. Just like anything else, practice makes perfect. You likely will misjudge where the ball will be leaving the setter’s hands. Past this, you need to find the sweet spot where you are not so far from the set that you barely are tapping the ball over but not so close that without twisting your body in the air, you will take a direct hit from the ball.
6. Consider a short toss
When working on your approach and spike, consider having a coach stand at the net and toss the ball to your hand. How does this help you learn how to hit?
By having a coach toss the ball, the player can focus 100% of the approach, zeroing in on footwork, core, and jump. If the ball does not land where it is supposed to for the hit, that is the coach’s fault, and the player only needs to focus on the approach.
Because you aren’t getting tripped up by the idea of a ball coming from any direction, you can really hone in on the systematic approach and which method works best for you. From a coaching standpoint, your coach can explain thoroughly what she wants you to do and then control the ball for you to focus on the drill.
Because the approach must become second nature, until this is mastered, timing will suffer. The short toss allows timing to become a non-factor until the approach has become a part of muscle memory. Once this happens, then timing can be worked into play.
Errors in volleyball hitting
With so much emphasis on what to do, it is equally important to focus on what may be going wrong and causing an ineffective hit. Below are some common issues.
- Goofy Footing
Believe it or not, that is a term. Basically, the footwork is backward. By focusing on the arms, you can remember the arms go forward with the left foot and backward with the right foot. Switch this up if you are a left-hander. - Player is under the ball
Basically, what being under the ball means is the player is leaving too soon for the approach and finding herself under the ball. Usually, this is caused by a fear of leaving too late and, thus, leaves too early, or they are not far enough back when they start their approach. Drills using a visual aid such as a cone or line help. - Ball goes into the net after hitting
A few things could be altered if this is the case. First, see if the setter can keep the ball off the net in setting. Second, work with the hitter to jump vertically and not toward the net and, finally, focus on the arm motion. If the hitter is near the net, perhaps do not follow all the way through with the arm swing. - The player lands in or under the net
This could be more than just an error – it could actually result in injury for either the hitter or one of the blockers. When the hitter mis-lands and lands in or under the net, she is most likely not planting her take off foot in her approach, and the momentum continues carrying her forward too far into the net.
The best way to correct this error is by continually practicing the footwork for the hitting approach. This doesn’t have to be just on the court! Practicing footwork can be done almost anywhere. A great tip to work on targeting the momentum upwards (instead of forwards) is to work on hitting a target above your head like a basketball net.

Practice your hitting
You can read all the tips, but until you are out there practicing, your approach and hits will stay much the same. Test out different approach methods and evaluate where you seem to get tripped up. Is it in the direction of the ball, the air-time, or the movements in general? Whatever is the case, don’t let it deflate you. Ask your coach for some pointers and get back out there. In no time, you will be hitting with muscle memory on your side. Click here for How to Practice Volleyball by Yourself




Leave a Reply