Whether it’s for a charity fundraiser, a competitive recreational league, or a club league, hosting a volleyball tournament is a great way to get in a full day of volleyball. It’s fun for the players, coaches, and spectators. And, if it’s planned well, it doesn’t have to be stress-filled day for the organizers.
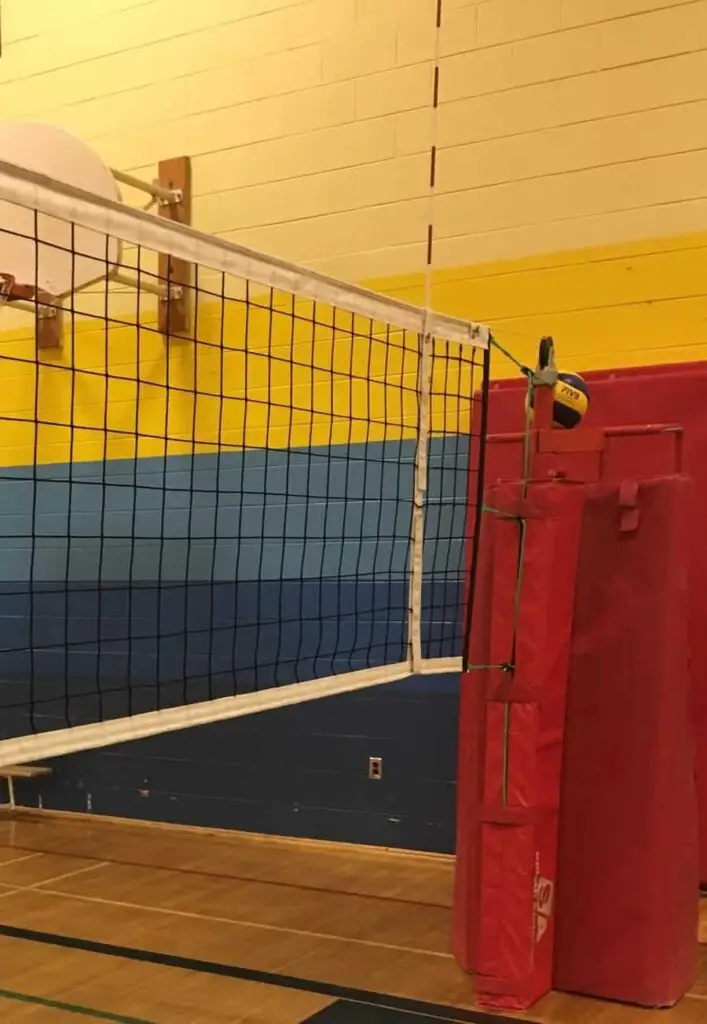
Hosting a volleyball tournament is a big undertaking. But do you want to know the secret to hosting a stress-free volleyball tournament? (Well, low-stress, at least.) You need to do the majority of the work ahead of time. The more prep and planning you do BEFORE tournament day will make the day a lot smoother for you. To be honest, once the day gets started, if you’ve planned the schedule out well, the day is pretty much going to run itself. You’ll just need to be available for any trouble-shooting.
Costs of hosting a volleyball tournament
Before jumping into the details, it’s a good idea to have a sense of what the estimated costs are going to be. These will vary depending on the type of tournament you are running, but generally speaking the following is a list of common costs for hosting a volleyball tournament:
- Venue
- Officials
- Scorekeepers (unless you’re assigning players who are between games)
- Prizes or prize money
- Rental equipment (if not covered in the venue permit)
- Insurance (if not covered in the venue permit)
Three stages of hosting a volleyball tournament
A good way of looking at setting up a volleyball tournament is to break it down into three stages: Planning, Organizing, and Running the Day.
Check out the handy, downloadable Tournament Planning Checklist at the end of the article for a quick summary of each stage.
1. Planning
The planning stage is when you decide many of the preliminary details. Once you get these details confirmed, you can more easily move into organizing and running the tournament.
⇒ Pick a date
- Picking a date isn’t necessarily as easy as checking your schedule for an open weekend. You’ll want to start with two or three options in mind, then start calling around for an available venue. You’ll be able to select your date based on the availability of the venues that will suit your needs.
- Also think about other occasions that you’ll want to avoid, such as holidays or long-weekends (unless, of course, the theme of your tournament is the holiday itself).
- Also consider if bad weather might be a factor during certain months. It’s hard to plan around weather, but you’ll definitely want to have a communications plan around potential cancellations (more on that below)
⇒ Confirm the venue
- There is always paperwork involved in renting a venue, so make sure that you give yourself enough time to get the registration process completed, especially if this is the first time you’re using the venue you’ve selected.
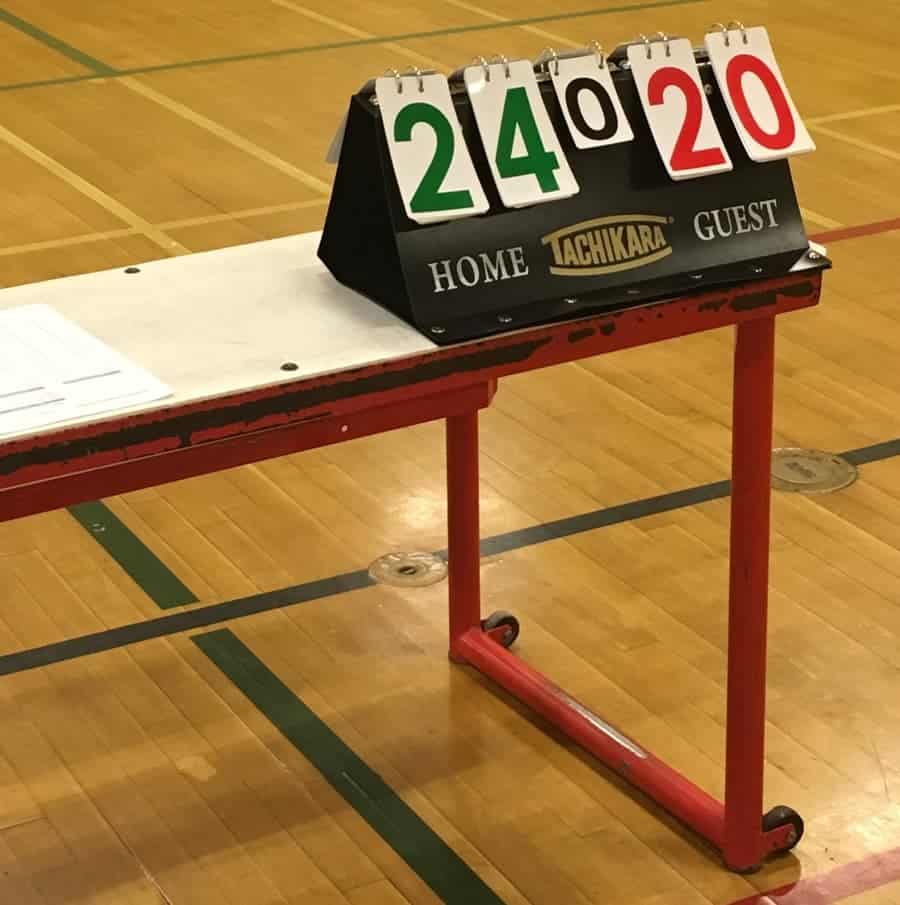
- Don’t forget to ask if all the equipment is included, or if you will need to bring any of your own equipment. It’s actually a good idea to have some of your own extra equipment anyway, such as score flip cards and antennae, as these items are sometimes hard to find in messy equipment rooms.
- Make sure you ask about insurance. It’s included with some venues, but not with others, so make sure you are covered. If you’re hosting a league tournament, the players will likely be covered through their league. However, if you’re doing a general call out for teams, you’ll need to make sure that players are covered in case anyone gets hurt.
⇒ Decide on the types of teams to invite
- If the tournament is for a club or recreational league, this is an easy step. However, if you’re looking at doing a broader call out for a charity fundraiser or recreational teams, you’ll need to narrow down the types of teams. Are you looking at doing a mens, womens, or coed tournament? If it’s coed, what will be the team format rules (such as minimum number of female players, and will it be mixed or reverse sixes).
- You’ll also want to be clear about the level of competition. The last thing you want is to mis-match a highly competitive, elite team with an out-for-fun recreational team. Don’t be afraid of offending potential teams – it’s no fun for anyone to be mis-matched. And people are usually pretty honest about their level of ability.
- If you have a wide range of teams wanting to register, add different divisions. That way you can accommodate more than one type of team. For example, you could include a competitive and recreational division, or a mens and womens divisions.
⇒ Set an entrance fee
- If the tournament is for a charity fundraiser, then you’ll want to set the team fees high enough to cover the costs of running the tournament, potentially some prize money for the winning team, and then of course have funds left over for donation.
- If the tournament is part of a club or league, some or all of the costs may have already been built into the annual registration fee.
- Setting the entrance fee may be difficult before you know how many teams will be registering. Consider running the tournament only if a minimum number of teams register (which is important when setting the schedule, too). That way it’ll be easier to calculate the projected costs and determine the best entrance fee.
⇒ Sponsors
- Contact some local businesses to see if they would be interested in donating prize money or merchandise for prizes in exchange for advertising during the tournament.
⇒ Set a registration deadline date
- The registration deadline date should be 1-2 weeks before the tournament day.
- This is important to help you organize the schedule, and determine the number of officials and equipment needed.
- Once a team registers with you, don’t forget to send them a confirmation that they are actually registered for the tournament, so they can go ahead and finalize their teams. This is also a good time to send them the rules of the day so that they can be prepared, directions, and any other relevant instructions.
⇒ Tournament prizes
- Decide what the prizes will be. Typically, first, and sometimes, second place teams receive prizes, even if it’s a charity fundraiser.
- Cash prizes are quite popular, mostly because they’re easy to organize and well-received by the teams. The amount of the cash prize doesn’t have to be a lot; even winning back the registration fee is appreciated.
⇒ Communications Plan
There are a lot of moving parts to hosting a volleyball tournament, so it’s a good idea to outline your communications plan during the planning stage.
- Have a primary contact for each team, preferably by email (so you can contact everyone at once), or at least by telephone. This way you can easily communicate tournament details, and send any cancellation notices that may arise.
- Make sure that you have shared YOUR relevant form of contact information in case a team has to pull out of the tournament last-minute. This should be a mobile phone that you will have with you during the tournament, and will be checking frequently.
- About a week before the tournament, email out the following information to the primary team contacts:
- Tournament rules and schedule
- Directions to the venue, and any relevant information, such as parking or which doors to use.
- Tournament start time, and if the teams playing first will be expected to help set up the nets.
- If children are allowed in the gym. Sometimes the venue rental permit doesn’t allow children under a certain age because of insurance liabilities.
- If a concession or merchandise stand will be set up, and what forms of payment will be accepted. Players often pack light for a tournament, so they will need to think about bringing forms of payment so they don’t miss out.
- On tournament day, have a team captain’s meeting first thing in the morning, before any games have been played, to do a quick run through of the flow of the day, cover some of the key rules, and any key messages that players need to know (such as, is there a planned lunch, etc). It is then the responsibility of the Team Captains to let the rest of their teammates know.
2. Organizing
Now that you know when, where, and how many teams, you can start to organize the day itself.
⇒ Create the schedule
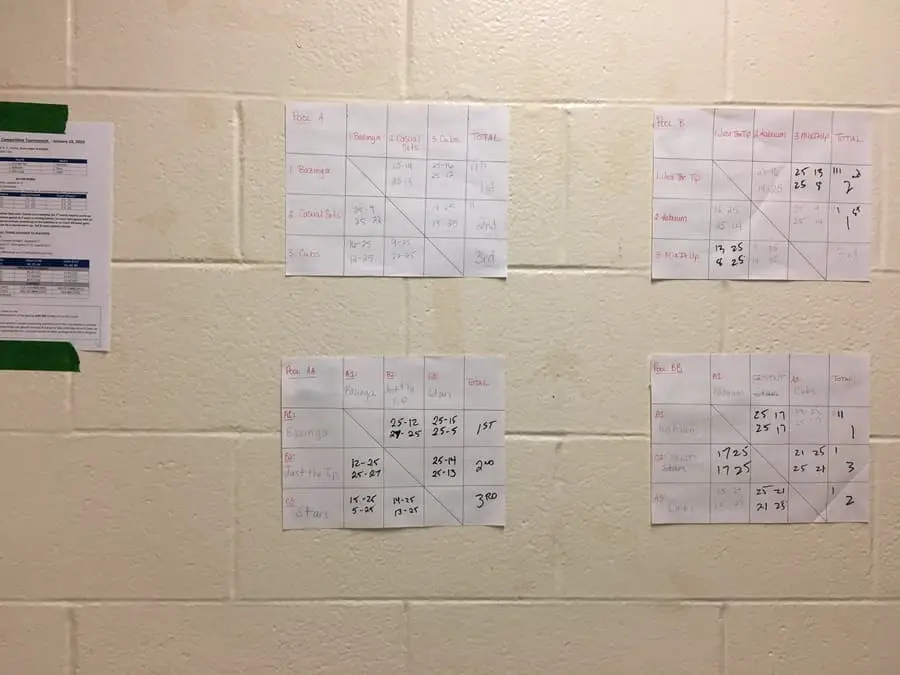
- A typical volleyball tournament starts with round robin play, which places teams into pools (or groups). Depending on the number of teams entered, there usually isn’t enough time for all the teams to play each other. So, by placing them into pools, teams will play all the other teams in their pool, and be seeded (ranked) for the play-off round.
- For example, a twelve-team volleyball tournament would likely consist of 3 pools with 4 teams in each pool. This also guarantees each team a minimum of three games before they move into the championship seeding.
- The purpose of the round robin is to rank the teams according to the number of games they won. For this part of the schedule, brackets are used (see below).
- Decide if the play off round is single or double elimination. Single elimination means that as soon as a team loses their first play off round game, they are out of the tournament. Double elimination means they’re out of the tournament after they’ve lost two playoff games.
- Based on the number of teams registered and the number of courts available in the venue, set the schedule by assigning teams to courts. Pools are often assigned to the same court, so that players don’t have to move all their stuff after each game, but this will depend on the number of teams and courts.
- Give enough time between games for some basic warmup, and for teams to pack up their stuff and move off the court. Having a bit of buffer time between games also helps the different pools to stay relatively close in time (though not always!) and gives the officials a bit of a break.
- Decide if you want to set a lunch break, or just start the playoffs as soon as all the teams are done playing round robin. Having a designated lunch break is nice because it allows all the teams to take a break at the same time, and it avoids having some teams start right into playoff games without some time to eat and rest. However, it can also make the day run a lot longer.
⇒ Create the tournament brackets
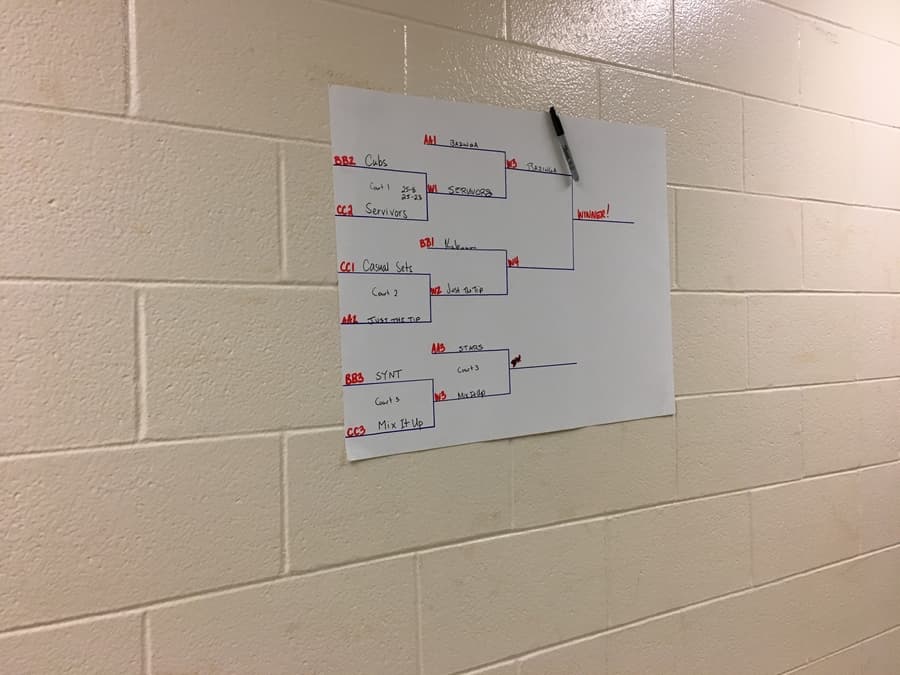
- The play-off round is where teams start to cross over and play teams in other pools, based on their ranked standings from the round robin play. This is also when teams start to be eliminated from the tournament based on losing a game – so it’s extremely important to get the standings correct.
- Brackets are used to outline each team’s path through the play-off games, based on wins or losses.
- You’ll definitely want to draw out your brackets before the tournament day using Bristol board and markers, leaving blanks for the team names to be added on tournament day. You can even generate these online.
- The brackets will be closely scrutinized during the tournament by coaches, players, officials, and even spectators, so if you don’t have experience setting them up, you’ll definitely want to ask for help.
- Make sure that you have clear tie-breaking procedures, which are shared with teams ahead of time. And stick to them. There’s nothing worse than having coaches, players, refs, and even spectators trying to figure out which team is actually supposed to move onto the next round of playoffs, and which team is eliminated. Tensions can run high during playoffs (even for recreational tournaments!) so plan well to avoid headaches later.
⇒ Hire officials
- Once you’ve got the schedule drafted, you can determine how many referees you’ll need for the day. Referees do come with a cost, so you want to organize this accurately, so that you’re not incurring unnecessary charges.
- Depending on the level of competitiveness of the tournament, a way to save costs is to have players from teams that are sitting off do the officiating for games during round robin. Obviously a high level of officiating shouldn’t be expected from these volunteers, and there should also be some sort of honour system on the part of the teams playing to call some of their own violations (such as admitting to having touched the net during a block).
- Another way to reduce costs somewhat is to have just a single referee during round robin and early playoff round games, and then add the second official to the championship game.
3. Running the Day
Ahh, all the hard work is done! Now, you can sit back and let the day run itself! Well, not quite. But, because of all the hard work you’ve done ahead of time, your day should run much more smoothly. But, yes, you still do have some work to do.
⇒ Materials to bring
It’s extremely important that you have the following items with you on tournament day.
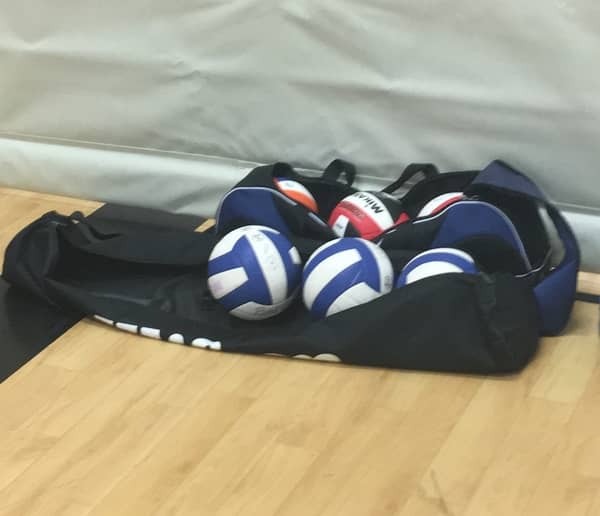
- Game balls
Consider bringing enough good quality volleyballs to be used as the game balls. Although teams will have their own balls, you can’t rely on each of them having decent enough ones. Also, sometimes the venue permit doesn’t include all the equipment, or even if they do, they might be poor quality. Sometimes, it’s best just to bring your own.
- Extra markers and pens
You’ll need the markers and pens to keep the brackets up to date, and you will inevitably need more pens for the scorekeepers. It’s actually a good idea to tie a pen to string and tape the string to each score keeping table, in addition to taping a copy of the schedule. These items often go missing!
- Masking tape
The masking tape will be used to tape the volleyball tournament brackets and a copy of the schedule in a central location outside the gym. Keep in mind that there will often be a small group congregating around the brackets to check team standings, so pick a location that can handle high traffic and a small crowd of people.
- Copies of the schedule
Make sure that you have enough copies of the schedule to tape one to each of the score keeping tables, and then a few in key locations in and around the gym. And always make sure that you keep at least one copy for yourself!
- Copies of the team lineup cards for coaches
Have extra copies of the team lineup cards. Even if you end up with extras, they can be used for future tournaments.
- Calculator
You will definitely need a calculator at some point in the day to figure out team standings. If you need to move into tie-breaking procedures, you definitely don’t want to do this math in your head! You might even have an audience, and you will want to be absolutely certain that your calculations are correct.
- Extra paper
You never know when this will come in handy.
- Clipboard or binder
This is not mandatory, but it’s helpful to keep all your information in a central location.
- Team contact information
Whether it’s a paper copy of everyone’s telephone number or a bunch of emails on your smartphone, make sure you have a way of getting in touch with each of the team primary contacts. This is extremely important if the tournament gets cancelled due to bad weather – you definitely don’t want teams driving through bad weather only to show up to an empty gym!
- Officials’ contact information
Same goes for the officials.
- First aid kit and ice packs
Hopefully you won’t have to use a first aid kit or any ice packs, but it’s a good idea to be prepared. Teams should also bring their own, but you can’t count on it. Have some “instant” ice packs on hand (you know, the kind that you squeeze to activate) so that you don’t have to find a freezer for them.
⇒ Before the tournament starts
- Arrive at the gym as early as the permits allows you to, at least 60-90 minutes before the first game starts. This window will be your busiest time, and there’s nothing worse than teams starting to arrive while you’re still getting things setup.
- The first thing to do is start setting up the courts. But, don’t try to do it all yourself! Enlist the help of others. Let teams know that if they’re playing first, they are responsible for setting up the courts, including the nets, antennae, officials stand, and safety padding for the poles.
- Women’s net height is 2.24 metres (or 7 feet 4 inches) and men’s net height is 2.43 meters (8 feet). If you’re organizing a coed tournament, the net height will depend on the specific rules that you’ve selected for your tournament, but is usually set at women’s height.
- After the courts have been setup, do check each court to make sure the antennae and safety pads have been added. The official at each court will confirm this as well, but it’ll save some time if you identify it sooner.
- Set up the scorekeeper tables and chairs, and make sure that each table has the following items:
- a copy of the schedule taped to it
- pens for scoring
- scoring flip cards
- enough scoresheets for each game
- team line-up cards
- Tape the tournament brackets and copies of the schedule in a central location.
- Identify each of the courts by a number. When teams start arriving, they will be looking for court 1, court 2, etc, so don’t forget to add these labels! Even a piece of paper taped to the ref’s stand will work (remember that extra paper you brought? See how it’s coming in handy!).
- Make sure that there’s room for spectators. Have benches or chairs setup along the sidelines, and make sure there’s a clear path between courts so that spectators wearing outside shoes aren’t walking on the courts.
- Host a team captain’s meeting before any of the games start. Keep it short – welcome everyone, identify yourself as the tournament organizer, go over the tournament format, and share any other relevant information about the tournament rules or venue. Remind the team captains to take back any relevant information to the rest of their team.

⇒ During the tournament
- As each game ends, have one of the scorekeepers bring you (or someone you’ve delegated this duty to) a copy of the scoresheet so that the brackets can be updated. It’s important to update this as soon as possible after each game ends, because it’s easy to misplace those scoresheets. Also, people will be keeping track of the standings, so you’ll want to make sure that the brackets reflect the most up-to-date information.
- Keep things as tidy as possible during the day. Not only does this make for a more pleasant environment during the day, it also makes cleaning up at the end of the day a lot easier and faster.
- Make yourself available for any trouble-shooting. As the tournament organizer, you might want to wear a brightly colored shirt so that you stand out. There will inevitably be someone looking for you, so you’ll want to be easily noticed. Or, depending on the question, maybe not so much 🙂
- Watch some of the games! Don’t get so busy organizing that you forget to watch some of the volleyball. Yes, it will be a busy day, but there will be lulls, so take advantage of some of your down time.
⇒ At the end of the day
- Present the winning team(s) with their prizes, and thank everyone for their contribution to the day.
- Make sure that all the equipment that was used is put away where it belongs. Ask the players to help with this as well. This includes the nets, antennae, and poles, but also the scorekeeping tables, benches, chairs, garbage cans – anything that was moved from its original place and used during the day.
- Respect the gymnasium space! It’s borrowed space, so make sure that your group cleans up after itself. Once you move the benches and score tables off the gym floor, it’s amazing how much garbage is left behind!
- If you’re planning on running another tournament in the future, jot down any lessons learned, or things you could improve for the next time. This is helpful to do while it’s still fresh.
How long does a volleyball tournament last?
This is a great question, especially if you haven’t participated in many tournaments. Unfortunately, it’s not a straight-forward answer. It all depends on the number of teams, the way the schedule has been setup, and how long each individual match takes. The best way to estimate how long a tournament will last is to setup a good schedule, and try not to deviate too much from it.
There will, of course, be games that go longer than they were scheduled for. The best way to try to stay on schedule is to make sure that teams are always aware of when their next game is to be played.
There are a lot of components to hosting a volleyball tournament, but if you break it down into stages and stay organized, you’ll see that it’s pretty straightforward – especially after you’ve run a few. Running an organized tournament means that your tournament will start to get a good reputation, and there will be continued interest from teams who want to sign up. Remember that it’s supposed to be a fun and safe day, so enjoy yourself!
Related Articles:
What should I bring to an indoor volleyball tournament?
What equipment is needed for indoor volleyball?
Best Snacks for a Volleyball Tournament
Tournament Planning Checklist:
Download the Tournament Planning and Hosting Checklist
Planning
- Pick a date
- Confirm the venue
- Decide on the types of teams to invite
- Set an entrance fee
- Sponsors
- Set a registration deadline date
- Tournament prizes
- Communications Plan
Organizing
- Create the schedule
- Create the tournament brackets
- Hire officials
Running the Day
- Materials to bring:
- Game balls
- Extra markers and pens
- Masking tape
- Copies of the schedule
- Copies of the team lineup cards
- Calculator
- Extra paper
- Clipboard or binder (not mandatory, but helpful)
- Team contact information
- Officials’ contact information
- First aid kit and ice packs
- Before the tournament starts
- Arrive early
- Set up the courts and scoretables
- Tape the tournament brackets and schedule in a central location
- Label the courts
- Set up space for spectators
- Host a team captains meeting
- During the tournament
- Update the tournament brackets after each game
- Tidy up throughout the day
- Be available for troubleshooting
- Watch some of the games!
- At the end of the day
- Present the winner’s prizes and thank everyone
- Put away all the equipment
- Tidy up any garbage
- Jot down any lessons learned for next time




Leave a Reply